

How to do Night Photography - 1 - Equipment
- CATEGORY: BLOG
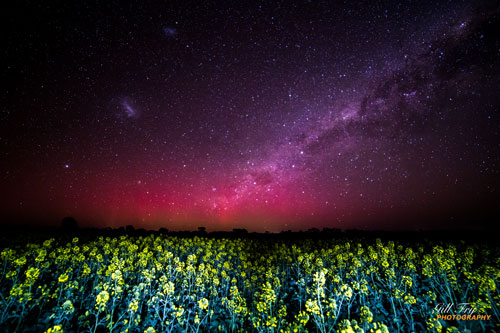
Night photography is one of the most amazing and enjoyable genres of photography. There is nothing better than being out at night under a zillion stars and capturing some awesome scenes on your camera. But there are a few things you need that will make the night rewarding and enjoyable.
Here is a list of things you will need to get you started on your night photography journey.
Sturdy tripod
A sturdy tripod is a must! As your exposure time will be about 20 seconds, you need a tripod to ensure there is no camera shake. My favourite tripod is my Manfrotto Befree. It is sturdy yet lightweight so is ideal for hiking or travelling.
DSLR camera which has manual settings
You need a DSLR that has manual camera settings. You may have been shooting on Auto, Shutter Priority (S or TV) or Aperture Priority (A or AV) – but now is the time to go full Manual (M). This is explained more in How to do Night Photography 2 – Camera settings.
It doesn’t matter whether you have a cropped camera (eg like my Canon 700D) or a full frame camera (like my Canon 6D). I specifically chose my Canon 6D for its ability to have low noise at higher ISO’s which is ideal for night photography.
Widest angle lens that you have
Most cameras come with kit lens 18-55mm which is fine for starting out. As you progress you may want a better lens.
For example: I have a Samyang 14mm for my Canon 6D, specifically for my night photography. This is an excellent wide angle lens that is fully manual (no autofocus and the aperture is adjusted by turning the ring on the lens).
Spare battery and memory card if you have one
If you are in the cold, your battery does not last as long. So it is a good idea to have a spare battery and an extra card for all those awesome photos you are going to take.
Remote shutter trigger (if you have one – not essential)
Don’t panic if you don’t have a shutter trigger. You can just set your camera on a two second delay. This is to ensure that after pressing the trigger your camera is completely still to take the shot.
Woollen sock and hand warmers for lens
On really cold nights, you may have trouble with your lens fogging up. You can buy specific lens warmers but I just use the sock and warmer method. Basically you take a warm unwanted sock and cut off the toe and heal area to make a tube. Pop the sock over your lens and double it over. Then get a hotties hand warmer, give it a good shake and put it between the layers of sock so the warmer is not directly against the lens. I just put it when I set up. Works a treat!
Let there be light
I usually take three lights with me. A big rechargeable flood light for lighting the way to my spot so that it can be accessed safely.
The second is a head torch which is a handy light, easily accessed and good for light painting.
The third is a little finger light. You can buy these extremely cheaply and it just stays on my finger in case I need to change camera settings.
Just a word here about photographers etiquette. If there are other photographers around, please don’t flash your torches about. It is best to ask “Is anyone on?” If the answer comes back “Yes”. Then please wait until they say “I’m off”.
Also – the red light on the head torch is able to be seen in photos. Any light source no matter the colour is picked up by the camera.
Waterproof boots, coat, hat scarf, gloves, wool socks, thermals
NOTE: It can get cold!!!!! Don’t underestimate the importance of warm clothing. Wear appropriate clothing. Do not wear cotton against your skin. If it is going to be cold, woollen socks are a must and Merino thermals should be worn under jeans/trousers. If you are cold and wet, you will not enjoy the session. Be prepared! If you are warm, you will happily be able to enjoy being out there photographing the night skies.